Hello again dear readers! Last time we took a look at D3.js and talked about its basics for a while. Today we're going to look at the two most basic hierarchy layouts in D3.js: the tree and the cluster.
These two layouts are very similar. The only difference between them is that the cluster layout generates a dendrogram, which puts all the leaf nodes on the same level. The tree is more concerned about the levels themselves.
So, how do I work with layouts? Basically, it's just two steps: get the data and feed in into the layout. Then you can get different layout-related objects (such as nodes and links) which will provide you the information you need to build a nice diagram.
But less talking, more coding, right? Let's try and build that diagram stuff!
For all the code we'll use similar HTML:
<html>
    <head>
        <script src="http://d3js.org/d3.v3.min.js" charset="utf-8"></script>
    </head>
    <body>
        <svg>
        </svg>
    </body>
</html>
Just insert another <script> tag with the needed JavaScript right before the closing </body> tag.
Tree
We'll start with the tree layout. Let's create a file named tree.js:
var width = 1000;
var height = 1000;

var svg = d3.select('svg')
            .attr('width', width).attr('height', height);
var tree = d3.layout.tree().size([width, height]);

d3.json('data.json', function(error, data){
    var nodes = tree.nodes(data);
    var links = tree.links(nodes);
    svg.selectAll('.link').data(links).enter()
       .append('line').attr('class', 'link')
       .attr('x1', function(d){return d.source.x})
       .attr('y1', function(d){return d.source.y})
       .attr('x2', function(d){return d.target.x})
       .attr('y2', function(d){return d.target.y})
       .attr('stroke', 'blue');
    svg.selectAll('.node').data(nodes).enter()
       .append('text').attr('x', function(d){return d.x})
       .attr('y', function(d){return d.y})
       .text(function(d){ return d.t;});
});
So, what do we do here? We start off with setting up our svg element. We set up its width and height (the values are
completely orbitrary, by the way. Nothing magical about them. It just looks good on my PC).
The really interesting part starts here:
var tree = d3.layout.tree().size([width, height]);
Here, we create our layout, using the d3.layout.tree() function. Immediately we set its size. An important thing to
know: The size of layout is very, very abstract. Here, it just maps straight to our SVG "canvas", but more often than
not there will be some sort of transformation. For example:
- You want to have relatively big nodes, so you'll have to shrink the layout a bit;
- You want to have a vertical-spanning tree instead of a horizontal-spanning one. Just switch width and height and you'll be fine.
- You want to have something weird like a radial layout.
But, for now, we won't bother with altering any coordinates and will just move along. After we created a tree, we must get our data and build our tree:
d3.json('data.json', function(error, data){
    var nodes = tree.nodes(data);
    var links = tree.links(nodes);
<...>
Let's talk about the data for a moment. As far as these layouts are concerned, the data must be formed in a tree-ish
fashion, with children being the only required field, containing the children of a particular node. In other words,
something like this:
{
  "t": "0",
  "children": [
    {
      "t": "00"
    },
    {
      "t": "01",
      "children": [
        {
          "t": "010"
        },
        {
          "t": "011"
        },
        {
          "t": "012"
        },
        {
          "t": "013"
        }
      ]
    },
    {
      "t": "02",
      "children": [
        {
          "t": "020"
        },
        {
          "t": "021"
        },
        {
          "t": "022"
        },
        {
          "t": "023"
        },
        {
          "t": "024"
        },
        {
          "t": "025"
        }
      ]
    },
    {
      "t": "03",
      "children": [
        {
          "t": "030"
        },
        {
          "t": "031"
        },
        {
          "t": "032"
        },
        {
          "t": "033"
        },
        {
          "t": "034"
        }
      ]
    },
    {
      "t": "04"
    }
  ]
}
The t attribute is not touched by the layout generation in any way and passed verbatim to the generated nodes.
A node is, basically, something that has its coordinates - in the space of the layout (which, as you should remember, is much more of an abstract concept than a set of canvas coordinates). A link is something that has a source node and a target node, and that's it.
So we use the data binding mechanism to bind our links and nodes to SVG lines and text elements:
svg.selectAll('.link').data(links).enter()
   .append('line').attr('class', 'link')
   .attr('x1', function(d){return d.source.x})
   .attr('y1', function(d){return d.source.y})
   .attr('x2', function(d){return d.target.x})
   .attr('y2', function(d){return d.target.y})
   .attr('stroke', 'blue');
svg.selectAll('.node').data(nodes).enter()
   .append('text').attr('x', function(d){return d.x})
   .attr('y', function(d){return d.y})
   .text(function(d){ return d.t;});
And here's what we get:
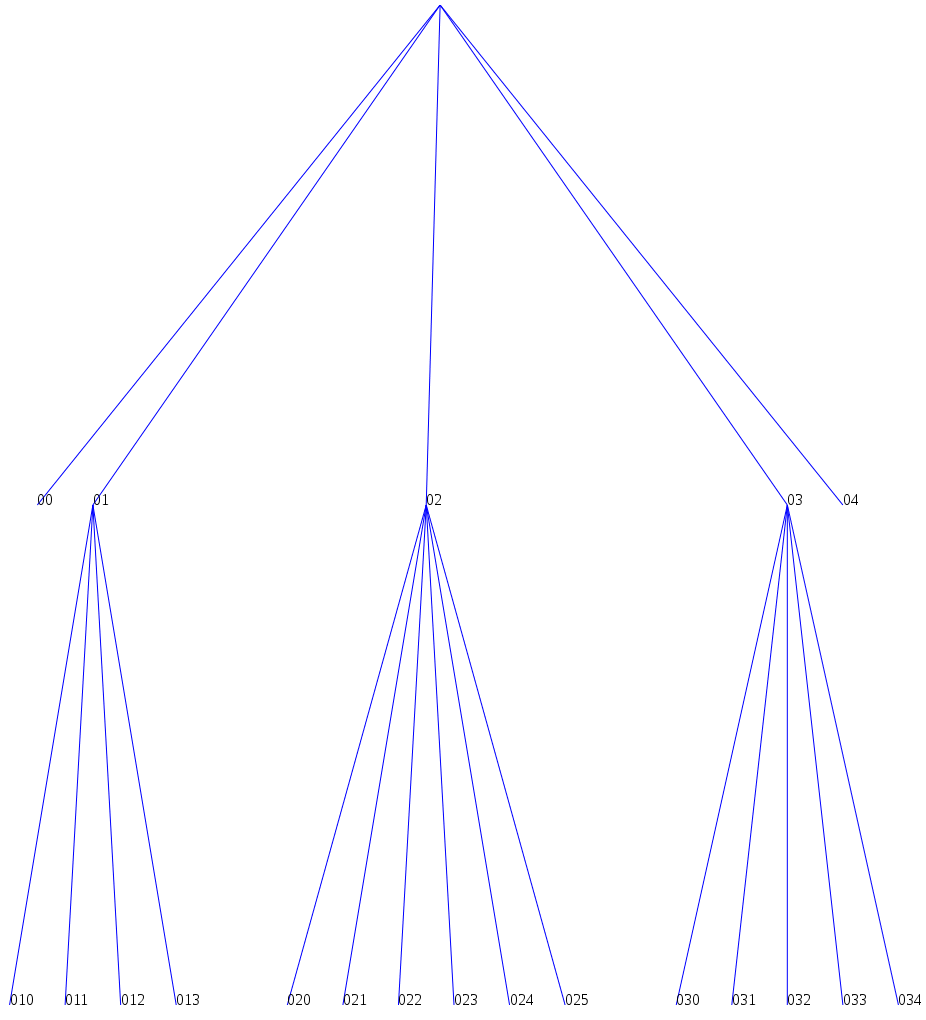
Looks kinda... Ugly, doesn't it? Well, we'll talk about beautifying it in a moment. Right now, though, let's talk about clusters.
Cluster
Working with a cluster layout is very, very similar to working with a tree
layout. Just replace d3.layout.tree() with d3.layout.cluster() and... Poof!
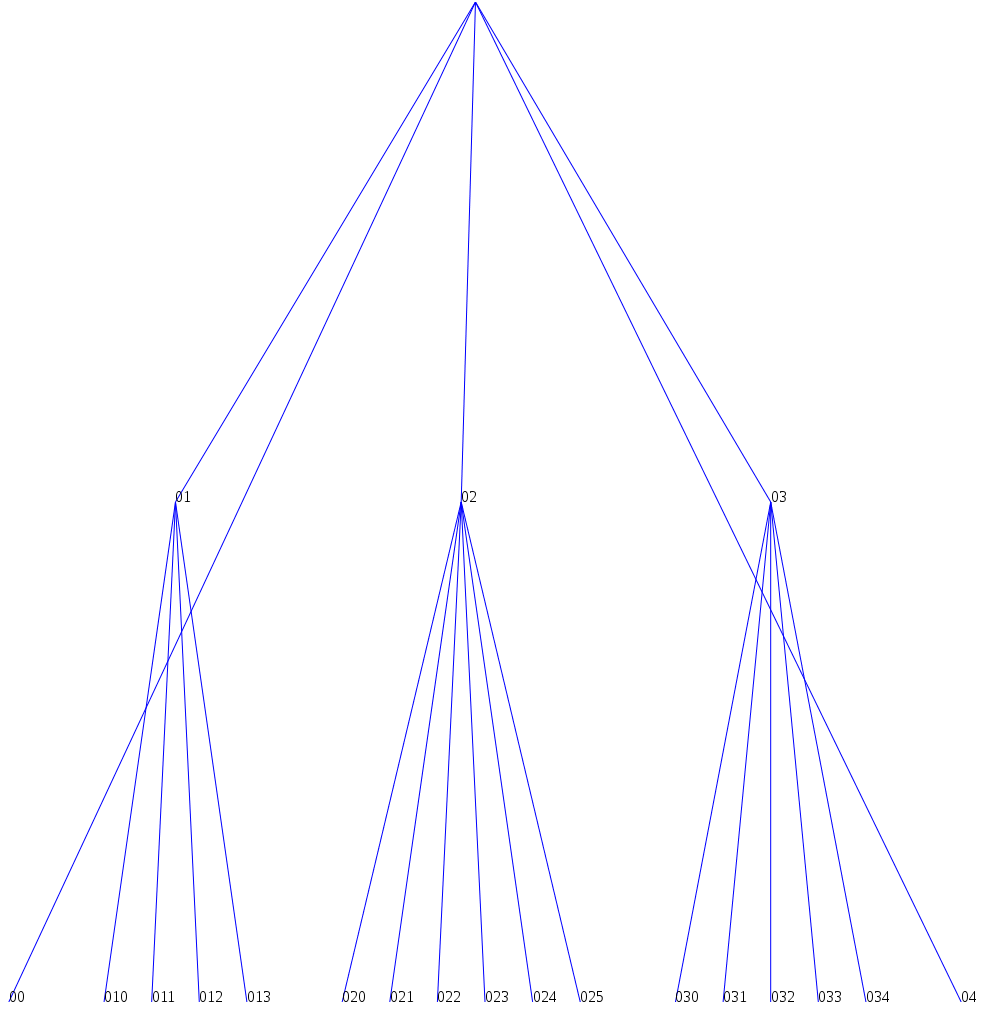
Not extremely different, but has its quirks.
Making your trees look good
So, right now the layouts are pretty ugly. The top label is pretty much invisible (you can see it if you peek into the SVG code though), the straight lines can be icky at times (like in the cluster layout) and the text nodes aren't even centered properly! What can we do?
Just some tips from someone who used it:
- Use
d3.svg.diagonalfor your links. It'll make a cute flowing line between your nodes - Give your tree some margins. Look into the tree example for how it's done.